Thursday, December 30, 2010

Peanut Butter Bars

I know I haven't been blogging long.  And most of you can tell I love chocolate.  But I have a big secret.  I am addicted to peanut butter.  I have talked about peanut butter chewiespeanut butter cookiespeanut butter french toast...I wonder if they have meetings for this kind of thing.


This recipe came from Paula Deen's Savannah Country Cookbook.  My mom gave me this recipe years ago before I even realized it was from my butter lovin' cooking idol. 


What you will need:
1 stick of butter (Who would have guessed?)
1/2 cup peanut butter
1 1/2 cups of sugar
2 eggs
1 teaspoon of vanilla
1 cup of self rising flour


I added a crust to mine.  If you want to do the same, then melt some butter and grab a package of Nutter Butters.  You only need half of the package.  So have fun with the rest!


Crush the Nutter Butters in a food processor and mix with some melted butter.  I used about 1/2 stick for the crust.  Press into a baking pan.  The recipe suggests a 13 x 9 pan. However, I used a smaller pan.  The result is a thicker peanut butter bar that will require a longer cooking time.  


Bake the crust at 350 degrees for about 10 minutes.  While that is cooking, you can start with the peanut butter mixture.  In a double boiler, melt down the stick of butter and 1/2 cup of peanut butter.  You don't have to buy a fancy double boiler from the store. You can make your own.  Fill a saucepan with water, turn on the heat, and place a stainless steel bowl (or even a thick glass bowl) over the water.  Make sure the bowl is big enough that it doesn't sit on the water.  Just be careful with the steam.  


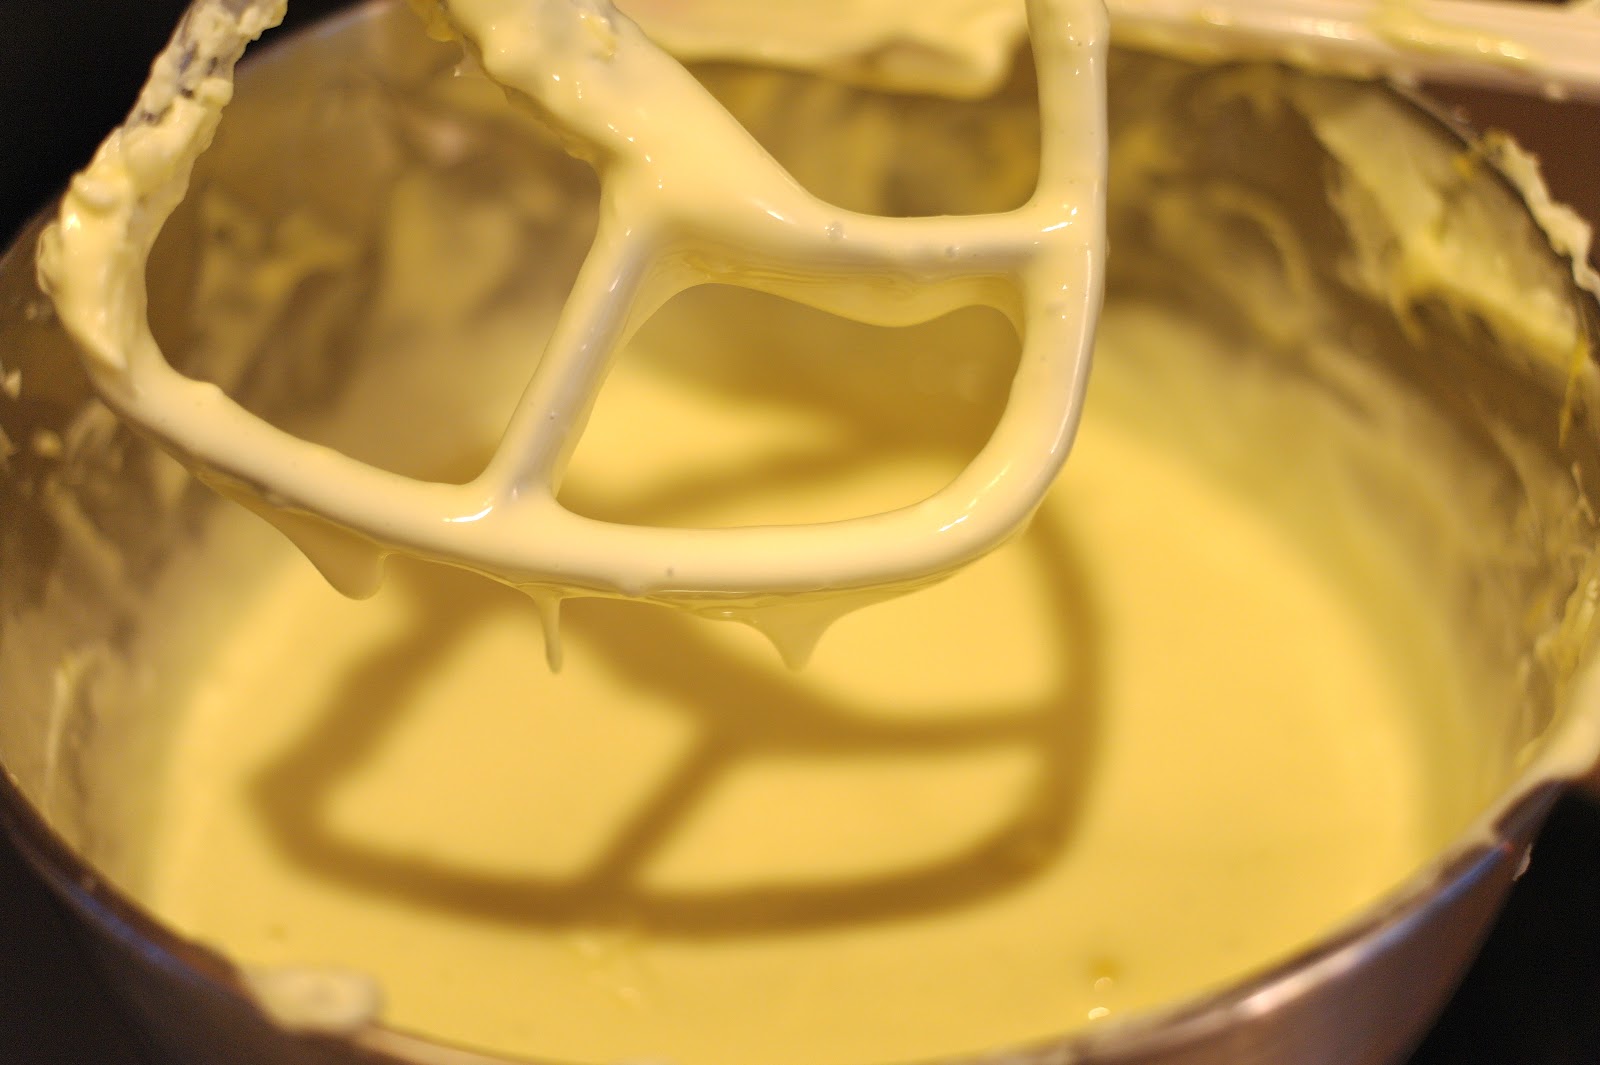
After the peanut butter and butter have melted, add the remaining ingredients.  Stir everything together and pour over the crust.  If using the bigger pan, bake at 350 degrees for about 25-30 minutes.  If you use a smaller pan, you will cook the bars for about 45 minutes.   You know they are done when the middle is no longer jiggly.  Kind of like my belly after all this holiday eating.  Cool completely, cut into squares, and store in an airtight container.  

Wednesday, December 29, 2010

Will Travel for Food

Mr. Baking Pixie and I are back from our holiday travels.  We spent time with family, got snow on Christmas morning, and ate way too much.  But that's the point of the holidays, right?


The first stop on our trip was Savannah.  We had never been so we decided to make a day of it.  We stayed at a beautiful bed and breakfast.  If you are ever in Savannah, check out The Azalea Inn.  The rooms are gorgeous, it's within walking distance of everything, and they have the cutest little yorkie named Joey.


Our first sweet stop was the Wright Square Cafe.  I got a chocolate truffle filled with Bailey's ganache.  


Our next stop was Mabel Francis Potter's Cupcake Emporium.  It's a little bit of a tongue twister, but we got two cupcakes.  We both love chocolate, but Mr. Baking Pixie isn't too fond of frosting.  So he got a plain chocolate cupcake with buttercream frosting.  Mine was chocolate with a raspberry cream cheese frosting.  Note to self: Learn how to make raspberry cream cheese icing.


And then on our way home, we stopped in Chattanooga for the night.  We went to the aquarium, got some BBQ, and ate some more cupcakes.  This time we stopped in a little shop called Chattanooga Cupcakes.


Mr. Baking Pixie got a lemon cupcake.  It was made even better because of the mountain of lemon cream cheese icing.


I got a (big surprise) chocolate cupcake.  But this wasn't your average chocolate cupcake.  I got a chocolate "overload" cupcake. It was a chocolate cake, with a ganache center, with chocolate buttercream frosting, topped with chocolate shavings.  My skinny jeans are getting thrown into the back of my closet until I can work this one off.  


So that concludes our cupcake adventures.  Now that the holidays are over and we are safely back home...let the baking commence.  I have autographed Paula Deen cookbooks calling my name.  

Sunday, December 19, 2010

Grown Up Stuff

I hate being a grown up sometimes.  Yes, I can eat ice cream whenever I want and I don't have to eat my veggies if I don't want to.  I am not even going to start with the bills and the big words like "deductible". It's when I have to put on my big girl panties and make some decisions is what I still find terrifying.  This week  I had to have a big girl moment. I withdrew from culinary school.  


Working during the day and taking classes at night was draining on me and my family.  I miss my husband and my two furry little babies, Wally and Cooper.


And with the talks of trying to have little Baking Pixies soon, the decision wasn't that hard.  I was taught a great deal of information.  I can now watch all my cooking shows and know they aren't talking a secret language.  I have tried new restaurants, experienced more cuisines, and opened up my horizons when it comes to food.  But it's time to hang up my chefs coat and keep baking on my own.  Here I go...

Saturday, December 18, 2010

New York Cheesecake

I love a good plain cheesecake.  If I was faced with having to choose either cheesecake or chocolate, cheesecake would win.  There....I said it.  Now I have to go and make it up to chocolate.


For a basic crumb crust, you will need the following:
2 cups of crushed graham crackers
1 cup of granulated sugar
2 teaspoons of ground cinnamon
3/4 stick of melted butter


Combine all the dry ingredients in a bowl.  You can either melt the butter on the stovetop or simply throw it in the microwave for a few seconds.  


Pour the melted butter over the stirred dry ingredients and mix with a big spoon.  You may need to add more butter if the mix is too dry.  The best way to tell is to use your hands.  Grab a handful of the graham crackers, squeeze, and let go.  It should act like wet sand.  If it holds its shape, then you are good to go.  If it crumbles really easily, add a little more butter.  Once you have the crackers ready, pour them into a spring form pan.  Using your hands, press them into the bottom.  Push up a little on the sides, but not too far. Bake the crust for about 10 minutes at 350 degrees.


While that is baking, you can mix your cheesecake batter.  


What you will need:
27 ounces of cream cheese (that's about 3 1/2 blocks of Philly cream cheese)
1 cup of granulated sugar
4 eggs
3 1/2 tablespoons of corn starch (you can also use cake flour if you have it laying around)
1 1/2 teaspoons of vanilla extract
1 teaspoon of lemon zest
1 cup of heavy cream


It is really important that your cream cheese is soft.  You can break a mixer if you try to whip cream cheese straight from the fridge.  So leave it out on the counter for a bit before you start anything.  Cutting it into smaller pieces helps too.  Using a mixer, you are going to blend the cream cheese and sugar until it is lump free.   If you are using a stand mixer, use your paddle attachment. 


Now slowly add in your eggs.  Add in one egg at a time and scrap down the bowl as you go. Once incorporated, add the cornstarch (or flour) and combine.  Add in your vanilla, zest, and heavy cream.  


Pour the batter into the cooled graham cracker crust.  Bake your cheesecake at 300 degrees for 60 to 90 minutes.  I know that is a long time to wait for a cheesecake.  It's so worth it though.  To tell when a cheesecake is done, shake the pan just a little.  Not too much.  The middle should be solid.  If it wobbles like my Grandma's Jello Surprise, keep on cooking. 


Once the cheesecake is done, DON'T immediately pull it out of the oven.  Open the oven door just a little and turn off the heat.  Slowly let it cool down.  Cheesecakes can "souffle" and when they fall, they can crack right down the middle.  Cooling it down slowly helps prevent that.  Once it has had plenty of time in the oven, pull the pan out and let it cool on a rack till it is comfortable to touch.  Place it in the fridge overnight. Remember....."Patience is a virtue".  Smile and know it will be there waiting for you in the morning.  

Tuesday, December 14, 2010

Apple Fritters

If you haven't checked out The Pioneer Woman, do it now.  Seriously....what are you waiting for?  I'll wait.  Go on.  

I found this recipe for apple fritters on her site.  I figured I would try them out because my Dad loves apple fritters.  And I get to see my parents next week!!


Here is what you will need:
  • 2 cups All-purpose Flour
  • ½ cups Sugar
  • 2-¼ teaspoons Baking Powder
  • 1-¼ teaspoon Salt
  • 2 teaspoons Ground Cinnamon
  • 2 whole Large Eggs
  • ¾ cups Whole Milk
  • 2 teaspoons Vanilla Extract
  • 2 Tablespoons Melted Butter
  • 2 whole Granny Smith Apples, Peeled And Diced
         GLAZE (optional)
  • 1-½ cup Powdered Sugar
  • ¼ teaspoons Salt
  • ¼ teaspoons Vanilla
  • ¼ cups Milk


Start by combining the dry ingredients.  Take the flour, sugar, baking powder, cinnamon, and salt and combine in a bowl.  In a separate bowl, beat the eggs.  Then add the milk, melted butter, and vanilla.  Make sure your butter is cooled slightly.  If it is too hot, it will start cooking the eggs.  Combine the dry and wet ingredients together.  Stir until just combined.  You don't want to stir too much.  Now add in your apples.  Again, don't stir too much.  

Drop the batter by the spoonful into hot canola oil.  Don't overcrowd the pan though. Turn them over once they start to turn a golden brown on one side.  Watch the fritters carefully because they will turn brown really quickly.  They should only be in there for a few minutes.

Pull them out of the oil and drain on a paper towel.  You can make the glaze that The Pioneer Woman suggests or you can simply dust them with powdered sugar. 


Saturday, December 11, 2010

French Macarons


So this week, I attempted French Macarons.  I have always thought they were gorgeous because you can make them any color and any flavor you can imagine.  I still need to work on my technique, but overall I think they came out okay.  And they tasted really good.  So good, I am trying them again this weekend.


The recipe I found came from Macarons.info.
What you will need:
110 grams Almond Flour
80 grams of fresh egg whites (left out so they can get to room temp)
200 grams of icing or confectioner's sugar
50 grams of caster or granulated sugar
pinch of salt (optional)
pinch of cream of tartar (optional)


Have I mentioned how much I love my digital scale?  The first step is to mix together your powdered sugar and almond flour.  If you want to add any dry flavorings, now is the time to do it.  For this recipe, I mixed in some cocoa powder.  Set the bowl aside.


Now let's focus on the eggs.  You need a mixer for this....unless you have a lot of time and a really strong mixing arm.  You are going to whisk the eggs and salt in a really really (Have I said really enough times?) clean bowl.  Anything in there can cause the eggs not to whip up properly.  Once the eggs start to get a little foamy, add the cream of tartar if you are using it.  Slowly add the caster (or granulated) sugar in a little at a time. Oh, and if you want to add any liquid flavorings or colors, then do it now.  You are going to whip the eggs to a medium peak.  That means, if you can pull your whisk out of the batter, the eggs should hold their shape for just a bit before it starts to soften again. If the eggs don't hold a shape at all, they are too soft...keep whisking.   If the whites keep their shape, then you have over mixed.  Time to start over.


Now gently fold the egg whites into your almond flour in 3 parts.  Don't worry.  It will come together.  Spoon the mixture into a piping bag fitted with a medium sized tip. You are going to pipe out the mixture into small circles that are about 1 to 1 1/2 inches in diameter.  If any of the cookies have a little tip to them, dip your finger in water and smooth it out.  You want the cookies to bake with a smooth texture.  So ignore my mini chocolate chips I threw on there.  You can actually add those into your almond flour instead.  Oh, the lessons I learn in my kitchen.


Once the cookies are piped out, leave them out on the counter (uncovered).  Depending on your kitchen, this can be anywhere from 20 minutes to 2 hours.  You want the cookies to develop a "skin".  So when you see that your cookies are no longer "wet", then you can put them in the oven.  What this does is help prevent the cookie from cracking and it will help develop the macaron "foot".  Bake at 315 degrees from 12 to 15 minutes.  The foot will start to develop after a few minutes.  When done, pull the cookies out of the oven and let them cool completely.  Fill with anything you would like. I have seen buttercream frosting, ganache, fruit preserves.....the list can go on and on.


I chose to make a peanut butter marshmallow filling.  Match up your cookies before you start to fill them.  It makes life a little easier.  Once done, especially if you use buttercream, refrigerate till time to eat.  Let them sit out at room temp for about 20 minutes and enjoy.


Friday, December 10, 2010

Candy Bar Pie

It's okay to cheat, right?  I mean, don't cheat on your taxes.   And definitely don't cheat on your spouse.  But when you have a 7 page term paper due in 2 days, 2 finals to study for next week, and you said you would make pie for your work's holiday luncheon......cheating is okay.  At least I keep telling myself that.

This pie is really simple and really yummy and the best part is.....you can throw just about anything in there you want.  


For this pie, you will need:
1 unbaked frozen pie shell (this is where the cheating part comes in)
2 eggs
1/2 cup all purpose flour
1 cup sugar
1 stick butter (melted, but cooled slightly)
1 cup of chocolate chips
1 cup chopped pecans (throw them in the oven at 300 degrees for 5-10 minutes to toast them up if you like)
1 teaspoon vanilla extract

Melt the butter first, so you can let it cool slightly while you start gathering everything together.  With a mixer, hand held or stand, beat the 2 eggs.  Then add your sugar, flour, and cooled butter in there.  Incorporate well and then add your vanilla.  Once that is mixed, you will add your nuts and chips.  Go ahead and stir those in by hand.  Pour the mix into your frozen pie crust and place in the oven.  Bake at 325 degrees for 45 to 55 minutes until the top is a golden brown color.  The flour in the mix helps to form a crust on top.   So don't worry, it's easy to tell when it is done.

Let it cool on a rack once you pull it out of the oven.  Once it is cooled, cover the top and place in the fridge.  This makes it a little easier to cut when it comes time to serve.  

Have fun with that mix.  Like I said before, you can throw just about anything in there.  I had a half sheet of brownies left over from the midnight munchies the night before (and no they were not "special" brownies.....I had a SERIOUS chocolate craving, okay?)  And I had some marshmallows in the cabinet.  All I needed was some graham crackers and "ta-da".......smores pie.


Sunday, December 5, 2010

Goodies in the St. Pete Area

For those very few people who read my blog, (Hi, my five followers!) here are some treats that we picked up today.  If you live in the St. Petersburg area, we had a new store that opened up on 4th Street.  I have never been in The Fresh Market before....but I will be visiting so much more now.

They had me snagged pretty much when we walked through the door, but then I smelled these....


fresh rosemary with sea salt rolls.  They have been invited to dinner tonight.

Then right next door to all the bread was my weakness.....the bakery.  We proceeded to pick up a peanut butter explosion cupcake


and a triple chocolate cupcake.  I think I actually gasped when I spotted this one. 


To finish off our adventure around the store, we ended up in the candy aisle...where we snagged a bag of these suckers.  Let me introduce you to peanut butter milk chocolate malt balls.  


If you have never been in The Fresh Market, I suggest you see if they have one nearby.   They had a huge selection of fresh fruit and veggies and a spice aisle that made me drool.

Also, if you live in the St. Petersburg area, check out Mazzaro's Italian Market on 22nd Avenue and Rollin Oats on 9th Street.   If your recipe calls for an unusual ingredient, these stores might just have it.

Saturday, December 4, 2010

Mise en place

What is mise en place (pronounced "MEEZ-ahn-plahs") you ask?  Well it's one of those fancy French terms that my chef started yelling the first day I was in class.  I had no clue what she was saying.  I didn't even know where the cookie sheets were, let alone what "mise" or "place" had to do with anything.  Come to find out....it's a really important concept.   One that I have to practice in school and I have started doing in my own home.  You should try it.

Mise en place simply means "to put in place".  It means read your recipe all the way through before you start, preheat your oven, gather any equipment you need, and measure all your ingredients before you mix the first thing.  It may seem like a "no-brainer" concept, but really you are just getting everything organized early.  This way you can concentrate on your recipe and your technique, instead of worrying about any surprises that might pop up.  Like when you need cookies ready in the next two hours and you start mixing right away and you get to step 6 and it says to chill dough for 5 hours before you bake.

Say it with me........MEEZ-AHN-PLAHS.  It will save you.

Monday, November 29, 2010

Lemon Souffle

Two weeks ago in class, we made lemon souffle.  And I fell in love.   So I decided I need to make it at home just to be sure it wasn't just lust.  It's official.....I'm in lemon love.


Now to make souffle,  you need two things.  Organization and a mixer.  An electric mixer will work just fine.  But the big thing is the organization.  Souffles don't wait on anyone. 

What you will need:
1/2 cup fresh lemon juice
1/2 cup heavy cream
1 1/2 teaspoons of lemon zest
2 egg yolks
1/2 cup granulated sugar; divided
a little over 2 tablespoons of cornstarch
6 egg whites
melted butter as needed
granulated sugar as needed
powdered sugar as needed


This makes about 4 medium sized souffles.

The first step will be to prepare the ramekins.  Rub the bottom and sides in melted butter.  Then coat with granulated sugar.  Set aside.  


Combine the fresh lemon juice and heavy cream in a stainless steel saucepan.  Add in the lemon zest, give it a little stir, and bring to a boil.  While the cream is heating up, whisk the egg yolks and half of the sugar in a bowl.  Once it is light and fluffy, add the cornstarch.  Now that the cream is boiling, you will need to temper the yolks with the hot cream.  To do this, add a little bit of the hot cream into the bowl with the egg yolks constantly whisking the mixture.  Add a little more hot cream.  And then a little more. Stir constantly as you do this.  You need to bring the egg yolks up to the temperature of the hot cream slowly or you will curdle the eggs.  Once the yolks are tempered, add the mix back into the stainless steel pan.  Whisk constantly over the heat until it starts to thicken.  Pull off the heat.  

Now whisk the egg whites. This is where the mixer comes in handy. Gradually add the remaining sugar while the whites start to thicken. You want to get the whites to a medium soft peak.  


The next step will be to fold the egg whites into the hot mixture.  If you need, transfer the hot mixture to a bigger bowl.  Add the egg whites to the mix in three additions. Slowly fold the whites in.  Fill the prepared ramekins almost to the top.  Bake immediately at 375 degrees for about 20-25 minutes.  When done, shake a little powdered sugar on top for decoration.  Eat almost immediately because the souffle will fall rather quickly.  I didn't really have a problem completing that last step.


Thursday, November 25, 2010

Peanut Butter French Toast

Thanksgiving breakfast is usually pretty simple around our house.  But when I can, I try to break out the griddle.  I introduced family to our favorite breakfast of peanut butter french toast this morning.   It's extremely "stick to the roof of your mouth" good.


The amount of batter depends on the amount of bread you are going to dip.  But I usually go for about 6 eggs, a little bit of milk (we used almond milk this morning), and a splash of vanilla.  If you can't find cinnamon swirl bread, then add a dash of ground cinnamon to your egg mixture.  Whisk all the ingredients together.  Then put a little bit of butter into a skillet or griddle to melt.  While the butter is melting, prepare the bread.  For the peanut butter, I try to use a natural peanut butter because it helps cut down on the sweetness.  Slather, yes I said slather, a layer of peanut butter between two slices of bread.  Dip the sandwich into the egg mixture and immediately put into the hot pan. Fry until the sides are golden brown. Serve with maple syrup and enjoy!   Just try not to do anything too strenuous afterwards. 

Friday, November 19, 2010

Top Chef Cookies


I know I am the only one at work that watches Top Chef, let alone Top Chef: Just Desserts.  But during the first season of Just Desserts, I caught myself drooling over one particular dessert made.  Out of all the sorbets and petit fours created I wanted to know how to make Eric's chocolate chip cookie.  You see, I will just about do anything for a good chocolate chip cookie.  Lucky for me and my dignity, Cookie Madness found the recipe.  Let's start off by saying these are not just your average ole chocolate chip cookies.  Do you see how much goodness we are dealing with here people??


Here is what you will need:

340 grams unsalted butter (12 oz) =3 sticks
200 grams granulated sugar (7 oz) = 1 cup
400 grams brown sugar (14 oz) 2 very, very tightly packed cups light brown sugar
21 ounces flour (4 2/3 cup)
1 tablespoon baking soda
1 tablespoon coarse type Kosher salt (or 1 3/4 teaspoons Morton kosher or table)
2 large eggs
2 large egg yolks
21 ounces good quality chocolate chopped into chunks


You can actually cut back on the salt even more if you want.  I am going to try these again tonight using only 1 teaspoon of Kosher salt.  


The first step is to melt the butter.  I used really soft butter.  Mine came out a little flatter than what was shown on the show, but I didn't hear any complaints.  You are going to cream the butter and sugars using a mixer.  In a separate bowl, combine all the dry ingredients.  Make sure to stir really well so you don't end up with any salty spots.  


Add the eggs slowly to your butter sugar mixture and then add your dry ingredients slowly.  Add a few spoonfuls and scrape down the edges....then add more.  If you add all at once, you will find flour in every corner of your kitchen.  Once combined, stir in the chocolate chunks.  


I portioned out my cookies pretty big, but you can always make them smaller. But with bigger cookies, you will easily yield about 24 buttery, delicious, chocolatey, oops...where was I? Oh yeah, bake at 325.  The time depends on the size of the cookie, but around 15 minutes should be good.  Wait till the edges get a nice golden brown and pull them out of the oven.  Let cool on a rack.  Store in an airtight container and enjoy!


Sunday, November 14, 2010

Strawberry Oreo Truffles

So I posted a while ago about the super easy Oreo Truffles my mom taught me to make.  This week I decided to try something a little different with them. I used the strawberry Oreos I found in our grocery store.  


The recipe is the same for the Oreo part.  I just decided to use a heart  and square cookie cutter for the shape this time.


Once cut, chill them in the fridge for about an hour.  Top off with chocolate ganache and a touch of pink royal icing and ta-da!


Friday, November 12, 2010

Tasty Carrot Cake

So there was a little confusion on exactly how "mini" my mini carrot cakes were that I posted about the other day.    I hope this picture helps.  


That cake is on a 6" cake board.  So I think that constitutes as a "mini" carrot cake. Right? Now on to the recipe!!


What you will need:
3 3/4 cups of granulated sugar
4 1/8 cups of cake flour
3 3/4 teaspoons of baking powder
It's really specific I know.  Let's continue
2 1/3 teaspoons of baking soda
2 1/3 teaspoons of ground cinnamon
a little over 1 teaspoon of iodized (table) salt
3 1/8 cups of light olive oil
8 eggs
1 1/2 teaspoons of vanilla extract 
1 pound of shredded carrots
1 1/2 cups of chopped walnuts
Can this recipe end already?
1/2 cup chopped pineapple
1/2 cup shredded coconut


This recipe makes a lot.  I got it from my culinary On Baking book.  The original yield is 8 cakes, but I chopped the recipe in half.  4 cakes is still plenty...so chop in half again if you need to.  But then you might get into some fractions that I last discussed in like 6th grade.  


The first step in this recipe is to blend the sugar, flour, baking powder, baking soda, cinnamon, salt, and oil together.  Scratch that, the first step is to get a really BIG bowl.  Then put all those ingredients in the really BIG bowl.  Mix on a low speed for about a minute.  Increase the speed to medium and mix for another 4 minutes.  Reduce the speed and gradually add in the eggs and vanilla.  Once the eggs are incorporated, fold in the carrots, walnuts, pineapple, and coconut.  


Divide the batter into prepared cake pans and bake at 375 degrees for about 30-35 minutes.  If you are going to use the clean tomato cans, only fill about half way.  The cakes are done once you can pull a toothpick out clean from the center.  


Let cool completely and then you can frost with the cream cheese icing found here. If you have trouble frosting cakes, like me, then apply a thin layer of frosting over the carrot cake. Place the cake in the freezer for about 20 minutes.  This is called a crumb layer.  The crumbs should now be frozen in place so you can apply a clean layer of frosting on top.  Decorate and enjoy!


Monday, November 8, 2010

Today's word is...

Resourcefulness 


I know. It's a big word.  But what do you get when you cross clean stewed tomato cans 


and chopped carrots?


You get MINI CARROT CAKES!!!


Stay tuned for the recipe!

Saturday, November 6, 2010

Cinnamon Apple Bread

I got this recipe from Bake It Pretty.  But I made it with a little twist.   I made this with vegan butter.  I know it doesn't even sound right, and I had to go to a special health foods store, but it worked.  And it tastes pretty darn good too.


What you will need:
1 3/4 cups unbleached all purpose flour
1/2 cup packed light brown sugar
2 teaspoons baking powder
1/2 teaspoon salt
1 teaspoon ground cinnamon
1/2 teaspoon ground ginger
1/4 teaspoon ground nutmeg
6 tablespoons softened butter (or vegan butter!)
2 eggs
3/4 cup apple cider
1 to 1 1/2 cups apple (chopped)

In one bowl, sift the flour, salt, spices, and baking powder together.  Set this bowl aside.  In a separate bowl, with either a stand mixer or electric mixer, cream the butter and sugar together.  When the two are light and fluffy, add the eggs in one at a time.  Once the mixture is well combined, add the apple cider.  The mix will become lumpy and soupy when you do this.  If you are using the vegan butter, the mixture will already be kinda lumpy when you add the cider. Don't worry, it comes together.


Once the cider is incorporated, stir the flour mixture in.  Only mix until the flour is wet.  You don't want to over mix this.  The batter should be lumpy.  As the Bake It Pretty website says, "embrace the lumpiness".  That's been my motto this weekend.  

Gently fold in the chopped apples.  Scoop batter into loaf pans or make into muffins.  Bake at 350 degrees for about 50 minutes (15-20 minutes for muffins) until golden brown.


Sunday, October 31, 2010

Lemon Tea Bread


What you will need:
3 ounces of unsalted butter
1 cup of granulated sugar
2 eggs
1/2 cup of milk
1 1/3 cup of all purpose flour
1 teaspoon of baking powder
1/2 teaspoon of salt
2 tablespoons of lemon zest


For the glaze:
1/3 cup lemon juice
2 cups of powdered sugar
1 tablespoon of vegetable oil
1 tablespoon of water


Cream the butter with the granulated sugar.  Once the butter and sugar is light and fluffy, add the 1/2 cup of milk.  Add the eggs in one at a time.  The mixture will be really soupy.


Sift the flour, baking powder, and salt together and then add the dry ingredients to your batter.  Mix just until the batter comes together.  It will be very creamy and light yellow.  Fold in the lemon zest when done. You can portion the batter into a muffin pan or a bread loaf pan.  Bake at 350 degrees for about 35 to 40 minutes if you are using the loaf pans (about 15 minutes for muffins) until light brown on top.   


While the bread is baking, mix the lemon juice, water, oil, and powdered sugar together in a bowl.  This will become your glaze. 


Once the bread is done and cooling on a rack, pour the glaze over the top. Make sure you have a piece of parchment paper or a paper towel underneath when you pour the glaze. Unless you mind cleaning up lemony sugary goodness all over your countertop.


Friday, October 29, 2010

Pumpkin Spiced Cupcakes

I made these cupcakes for a luncheon at work this week.  I was told by a co-worker that she didn't even like pumpkin, yet she ate the whole thing. They are that good....trust me.  It's almost like eating pumpkin pie.  Mmm...pumpkin pie.


I found this recipe in the Fall Baking magazine by Betty Crocker.  You know the little magazines in the check out aisle at the grocery store.  Ever wonder who buys all the gossip magazines and recipe books right before you check out in the express lane?  Ladies and gentlemen, that would be me. The recipe was meant for a cake and I changed the ingredients just a little. But here is what I used for the cupcake batter.


1 box of Betty Crocker spice cake mix
2/3 cup granulated sugar
3 eggs
3/4 cup vegetable oil
(1) 15 ounce can of Libby's 100% pure pumpkin


Add all the ingredients together in a bowl. With a stand mixer or hand mixer, mix together for about 30 seconds on low speed.  Just enough to break up the eggs and get everything moistened.  Then turn the mixer on medium speed and mix for 2 to 3 minutes.  Line a muffin pan with cupcake liners and divide the batter evenly.  


If you have an ice cream scoop handy (one with the release button), you can use it to portion out the batter perfectly.  I have had an ice cream scoop for muffin and cupcake batter and the one time my husband used it to scoop out ice cream this week.....it broke. You can also divide the batter between two large plastic ziploc bags.  Since most cake mixes yield about 24 cupcakes, you can throw a bag in the fridge until you need it.  Just cut a hole in the corner and use it to distribute the batter.  It helps keep batter from getting everywhere.


Bake at 350 degrees for 19-21 minutes.  The cupcakes stay SUPER moist when they are done.  So if you run into a problem....such as the humidity in Florida....just store the cupcakes in the fridge in an airtight container until you get ready to frost them.


While the cupcakes were baking, I made a really quick cream cheese frosting. For this frosting you will need the following:


3/4 cup of unsalted butter (softened)
12 ounces of softened cream cheese
1 Tablespoon of vanilla extract
1 pound of sifted powdered sugar


It is really important that you sift the sugar or the frosting will be all lumpy. And also leave the butter out on the counter for a bit too.  If the butter is too cold, it can cause lumps as well.  I know, I know.  So much to think about.  But if you remember those few things, it will help produce a frosting that I ended up tasting about 4 times...you know, for quality assurance purposes. 


Beat the softened butter and cream cheese until smooth.  Add vanilla next. Slowly add in the powdered sugar.  Just spoonfuls here and there.  Don't dump the whole thing in at once. Scrape down the bowl after every few scoops added.  If the icing is a little too thin to frost the cupcakes, just place in the fridge for about 30 minutes.  


And there you have it.....just in time for Halloween.