Monday, December 12, 2011

I swear my kitchen is out to get me.  Either the oven is on the fritz or the measuring spoons are crying mutiny in the silverware drawer.  Everything I have made in the last week has just come out...well "weird".

Take today for example.  I found a new recipe for lemon poppy seed muffins.  I knew as soon as I added the liquid ingredients to the dry that something was wrong.


I came out with lemon poppy seed puffs instead.  Puffs that need more lemon and less poppy then the recipe calls for.  So there is no recipe this week.  I need to make sure the measuring spoons haven't been trash-talking about me to the whisks and spatulas yet.


Next week, lemons....you are mine.

Thursday, December 1, 2011

Chess Cake


Chess cake always makes me a little homesick.  I always think of my mom when I make this cake.  And it wasn't even a favorite of hers.  I guess it is because I still pull out her recipe card even though I know it by heart.

Now, no one really knows how chess cake or pie got it's name. But according to one of my old culinary school books, the recipe is definitely southern in origin.  And one day a lady made this pie and someone asked what kind of pie it was.  She replied in her sweet southern accent that is was "jess (aka "just" for you northern folks) pie".  "Jess" was mistaken for "chess" and there you have it.


For the crust of the cake, you need the following:

1 box of yellow cake mix
1 stick of butter, melted
1 egg


Mix all three together in one bowl.  It will be very very thick.  


Once it is mixed, press it into a 9x13 inch pan that has been sprayed with cooking spray.


For the filling, you will need the following:

3 eggs
1 8 ounce block of cream cheese, softened
16 ounces of powdered sugar

Again, mix all three things together with a mixer.  Do you see how simple this recipe is?


Pour the filling onto the uncooked yellow cake mix and bake for about 30 minutes at 350 degrees. You want the top to be golden brown before you pull it out of the oven.  Once the cake is pulled out of the oven, let it cool completely before storing it in the fridge.  Cut it into small squares and serve when ready.


And now you can tell your friends you have made "jess" a little ole cake.  Enjoy!


Sunday, November 20, 2011

Spiced Butter Cookies


What you will need

2 1/2 sticks of butter, softened
1 cup of granulated sugar
1 large egg
seeds from 1 vanilla bean (or 1 tablespoon of vanilla extract)
2 1/2 cups of all purpose flour
1/2 teaspoon of baking powder
1/2 teaspoon of salt
1 1/2 teaspoons of pumpkin pie spice 


I took an old sugar cookie recipe and played around with the ingredients for this cookie.  The old recipe never really reminded me of a sugar cookie anyways.

Start off with a ton of softened butter.  Cream the butter with the sugar on low speed.  Scrape down the bowl if you need to.   Next, comes my favorite part....opening up a vanilla bean.


Of course, you can always use vanilla extract if you can't find vanilla beans.  Add your egg and vanilla to the butter and sugar.  Mix just until everything is incorporated.


Combine all your dry ingredients together and add them all at once to your mixer.  Now if you have a stand mixer, throw a hand towel over the bowl.  Flour will start flying.  If you have a hand mixer, might I suggest a gas mask then.

Once the dough starts to clump up, you are done mixing.  Dump the dough out onto some parchment paper.


Place another piece of parchment on top and press it down.  Using a rolling pin, flatten the dough out until you reach the thickness you want.  


Refrigerate the dough for at least an hour.  When ready, preheat your oven to 350 degrees.  Pull the dough out and use whatever kind of cookie cutter you want.  


Place the cookies on a cookie sheet and bake for 10 to 14 minutes.  It really depends on the thickness of the cookies.  But once the edges start turning golden brown, you are ready to pull them out.  Let them cool on a rack for a few minutes before stacking them up and storing them.

As for the scraps of dough leftover, roll it out again and start making more cookies.  Just keep it in the fridge until you are ready to roll it out and cut it.  This recipe yields almost 3 dozen 2 inch cookies.  

And if I don't get to posting again this week, have a Happy Thanksgiving everyone!!


Monday, November 14, 2011

Pillow Cookies

The holiday season is fast approaching us and I have the perfect gift to give.  Cookies!  And not only are they cookies, but they come with their own present inside.  Brownies!!  


With my last post, I mentioned the awesome Bakerella.  I grabbed this recipe off of her site last year, but I made a tweak here and there with the ingredients.

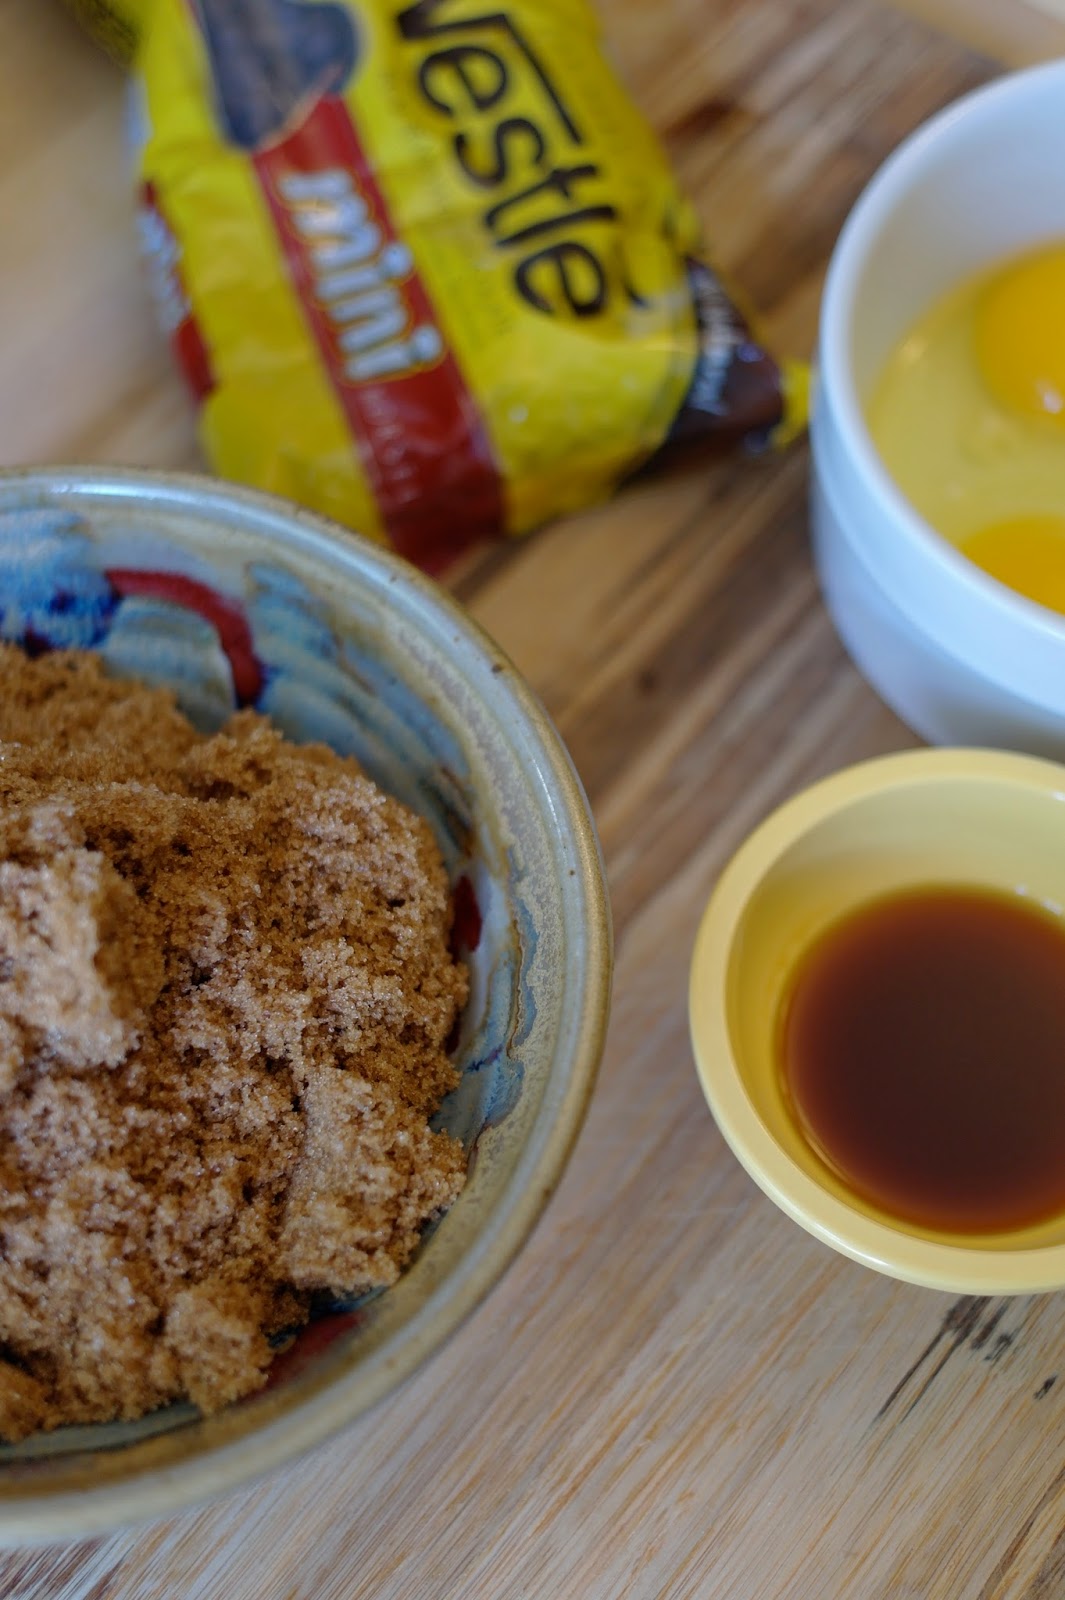
Here is what you will need

1 package of brownie mix (choose your fav brand)
2 sticks of unsalted butter, softened
1 1/2 cups of dark brown sugar, packed
2 eggs, plus an egg yolk
1 1/2 teaspoons of vanilla
2 1/2 cups of all purpose flour
2 teaspoons of baking powder
1/2 teaspoon of baking soda
1/2 teaspoon of salt
1 12 ounce bag of mini chocolate chips

Bake the brownies and cut into 1 inch squares when cooled.


Gather all your ingredients together.  You can throw the flour, baking powder, soda, and salt into one large bowl.  Just make sure you stir it up real well.


Cream your butter and sugar together.


Add in your eggs and vanilla.  Now throw in the flour mix and combine on a low speed.  You don't want flour everywhere.  When the dough starts to clump up, throw in the chocolate chips and combine.  


Cover the bowl and throw in the fridge for 1-2 hours.  Once the dough has chilled, preheat your oven to 350 degrees. 

Using a 1/2 cup measuring spoon as your guide, scoop out enough dough to fill the spoon.


Did I mention how big these cookies were?  One word...massive.

Place the dough on parchment paper and press down the dough a little to make way for the brownie square.  


Now form the cookie dough around the brownie chunk like this...


You can get about 6 cookies to a large cookie sheet.  Bake for about 20 minutes until the edges are golden brown.  When you pull them out of the oven, let them sit on the cookie sheet for a few minutes to cool and then transfer to a rack.

And here is proof of how big the cookies are.  Needless to say, this recipe only yields about 12 cookies.  12 warm delicious (and let me mention again) brownie filled cookies...


Thursday, October 27, 2011

Ghost Pops


Let me start off by saying that I need to practice with my Americolor Gourmet Writer pen.  I am not uber happy with this little ghosts, but I know one thing for sure.  They sure are tasty.  So...

Have you ever heard of cake pops?  If you head on over to Bakerella's site, you will find an incredibly talented woman churning out adorable cake pops of every shape and color.  Obviously, I am immensely jealous of her skills.  But I am pretty sure she doesn't have to worry about me creeping into her cake pop territory any time soon.


For these ghost pops, I just used a box cake mix and frosting and the leftover white fondant from my mummy cupcakes.   Feel free to choose what cake you want, but remember you are putting white fondant on top.  So if you choose a darker colored cake, it might show through.

Follow the basic instructions to make the cake pops here.  Instead of making a ball shape, I made more of a "blob"shape. Throw them in the fridge to harden a little bit.


Melt some candy coating or white chocolate to help insert the lollipop stick into the bottom.


Roll out your fondant and cut out a circle big enough to cover the cake "blob".  I really don't know any other term to call them.


Press the sides down gently.


Add eyes and a mouth to the pops and you are done!  These pops kind of remind me of how you wanted to be a ghost for Halloween when you were little and your mom took an old white sheet and cut out holes so you could see.

Ah! Those were the days.  None of this running to Target and picking out a costume in a bag.  We had to be creative.  For example, corn syrup and ground coffee make for a great (albeit sticky) hobo's beard.

And now let's just go hide those photos so we don't have evidence we actually did that!

Thursday, October 20, 2011

Mummy Cupcakes


I never really get in the spirit of decorating for Halloween, but I am getting bored watching television all day and I had an itch to be creative.

You need to whip up a batch of marshmallow fondant for these cupcakes.  Most of the fondant you can leave white.  But if you have some black food coloring, you can color a small amount for the eyes. Oh, and wear some gloves when dealing with the black food coloring.  That's if you don't mind having scary discolored digits for a bit.

Roll out the white fondant until you reach the thickness you want.  I rolled mine out pretty thin.  I used an old biscuit cutter for the main shape of the mummy.


And for the eyes, I used piping tips.


If your fondant is a little dry, dab a small amount of water on the fondant to make the eyes stick.


Add a little stitching...


I used the Americolor Gourmet Writer pen.  You can always use your black food coloring and paint some stitching on if you like.

Now cut some thin strips of white fondant and place over the mummy face however you want.  Don't worry about being precise with your cuts.


Now take your biscuit cutter and cut the shape out again.


Scrape away the edges and "ta-da".  Frost your cupcakes and place this little cutie on top.

Now to figure out what to do with all this leftover white fondant.  Scary ghosts, anyone?

Wednesday, October 5, 2011

Oatmeal Raisin Cookies


I've got a ton of things to do.  There's laundry, then I got to feed the baby, then I have to catch up on my saved episodes of Supernatural, then throw the laundry in the dryer, then feed the baby again, and show the cats some attention before they tear up my plant again, then feeding time again...

What day is it?

Oh, and I need to give you this recipe for oatmeal raisin cookies real quick.

I decided to make these cookies because I had a huge box of raisins left over from my granola/trail mix I made the other week.  

Here is what you will need

 2 1/3 cups of all purpose flour
1 teaspoon of baking soda
1 tablespoon of ground cinnamon
5 cups of quick-cooking oats
2 sticks of unsalted butter
1 1/4 cups of granulated sugar
1 1/4 cups of brown sugar, packed
2 eggs
1/4 cup of orange juice concentrate
1 tablespoon of vanilla
1 teaspoon of salt
2 cups of raisins

This cookie recipe is really simple.  Take the first three ingredients and sift together into a large bowl.  Add in your oats and stir it up.  Now cream the butter until light and fluffy and throw in your sugars.  Once the sugars are mixed in, add your eggs.  Scrape down the bowl if you need to.  Now throw in the OJ, vanilla, and salt.  

Now your mixture may look a little bubbly when you add in the OJ concentrate.  Don't worry, it will come together when you add in the flour.  Fold in the flour and raisins.  Again, have I mentioned to have a LARGE bowl when you do this?  Got one?  Good.

Preheat your oven to 375 degrees and drop the cookie dough onto a greased cookie sheet or one lined with parchment paper.  Bake for about 12 minutes until the edges are golden brown.  This recipes makes about 40 cookies when you use a small portion scoop.  

Really?  Already?  Gotta go.  It's bottle time again!